Add Favicon to your Blogger Blog. Favicon or Site Icon is the tiny image that appear next to your website title in the browser. You should add Favicon to your Blogger Blog to create more impression. It helps your users identify your website and more frequent visitors of your site will build an instant recognition for that tiny image. This increases your brand recognition and helps you build trust among your audiences. In this article, we will show you how to add a favicon to your Blogger blog.

Why you should Add a Favicon to Your Blogger Site?
Just like I mentioned earlier that it establishes your website’s identity. However, it also improves your site’s usability and user experience.
Also Read – How to Fix GTmetrix Expire Headers Errors for your Blog.
Whenever somebody bookmarks your website, Favicon will be used as the Icon as well. This helps you build an identity. User can recognise your site easily.
How to Create a Favicon
You can use your brand’s logo as your site icon or favicon. The recommended size for your site icon image is at least 512 pixels in both width and height. Make sure, while you upload Favicon on Blogger, your file size should be lesser than 10kb. The best thing you can do to reduce favicon size is that you can use online sites to create free favicon . ico files. The benefits of creating “*.ico” is that the image size and resolutions are achieved for any image. You can use http://www.favicon-generator.org/ for that.
Now when you are ready with your Favicon image, proceed with below steps to add favicon to your Blogger Blog
Steps to Add Favicon to your Blogger Blog
- Login To Your Blogger Blog and Open the main page.
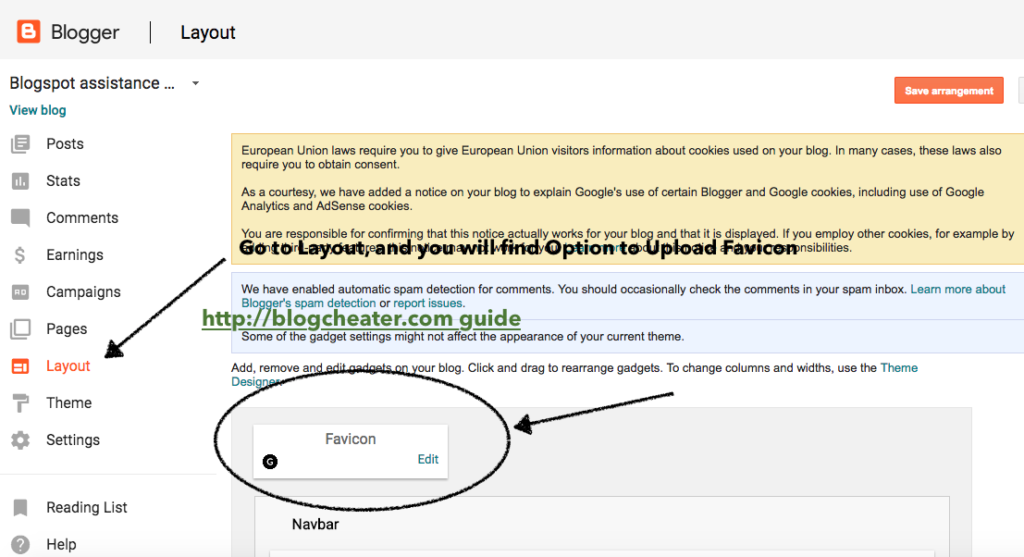
- Click on “Layout” on left side.
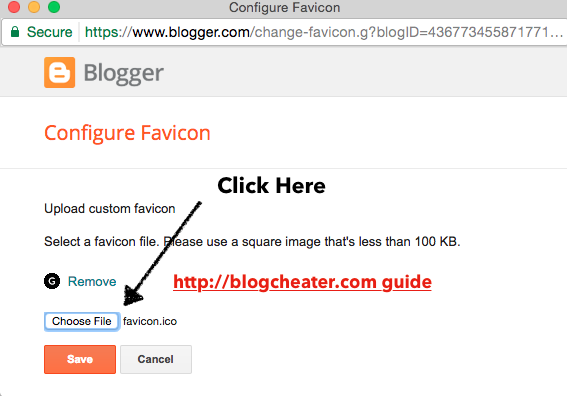
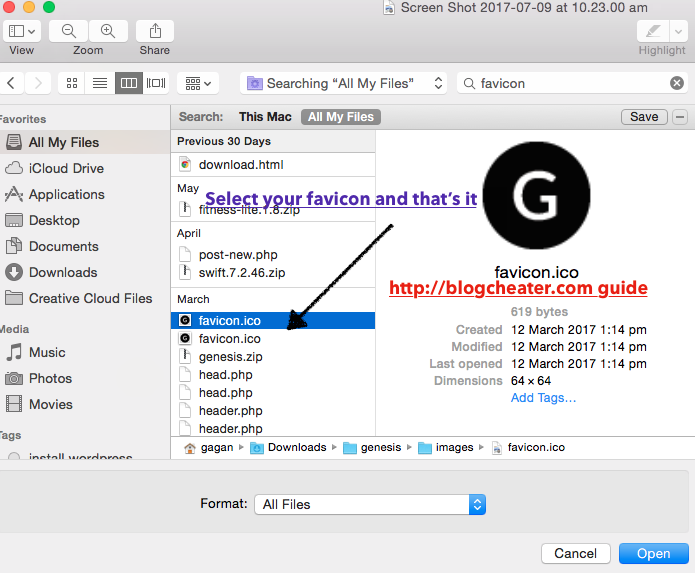
- On Favicon Tab, click edit and upload your image which you wish to upload as favicon.
- Click “Save” to apply the new favicon to your Blogger blog.
INFOGRAPHICS to Elaborate How to Add Favicon to Your Blogger Blog
